Google Analytics is highly functional for digital marketers. It lets them collect valuable information about their website’s visitors. With more than 56% of websites using Google Analytics, it’s easily the most popular tool for digital marketers. Google Analytics enables you to track and measure your company’s traffic goals as well as demonstrate the return on investment of your website and social media presence.
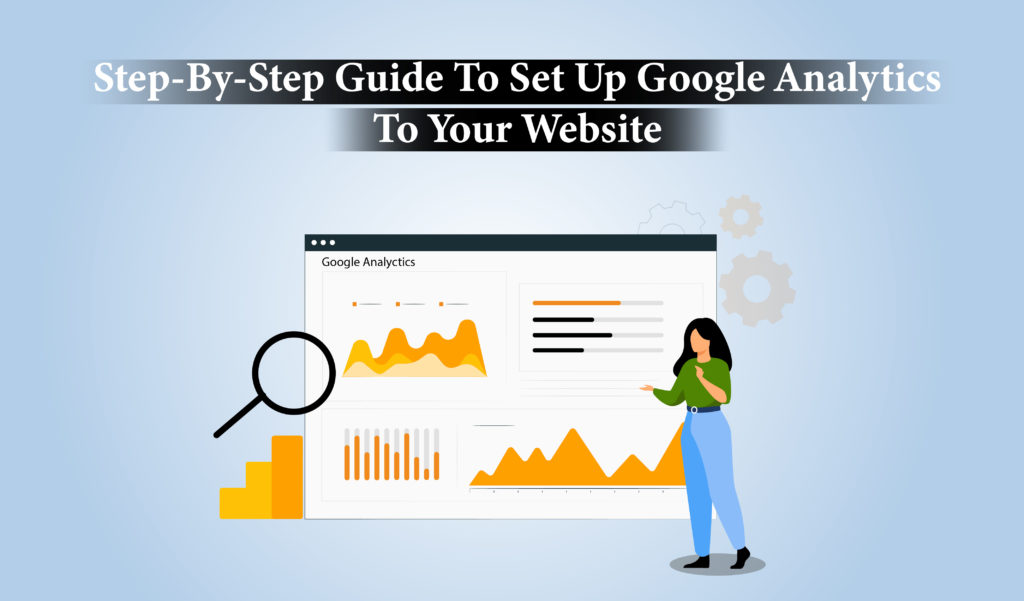
Getting started with Google Analytics can be challenging. Hence, our Web Design Jacksonville Fl experts have prepared this guide for you. This step-by-step guide will teach you how to set up the platform in no time and get started with Google Analytics without any difficulty.
Google Analytics: Why Do You Need It?
Google Analytics is a strong and powerful tool that delivers crucial data to your website and visitors. Google Analytics is one of the most popular tools for digital marketers, with over 56 percent of all websites utilizing it – and for good reason. It helps you gain a plethora of information about your website’s user. Hence, if you have a website, setting up Google Analytics on it is a must states Website Design Company.
Here is a data that Google Analytics can provide:
● The actual data of digital traffic driven to your website
● Where did your visitors come from?
● Traffic to individual pages
● Total number of leads converted
● The websites from which your leads originated
● Information on visitors’ demographics (e.g. where they live)
Functioning of Google Analytics? What does it monitor?
When a page is responsive, a little piece of Javascript is activated. It communicated with five little cookies on your device before reporting to Google and storing the data in our Google Analytics profile. Analytics was able to monitor that the page was accessed thanks to a smart mix of Javascript and cookies.
It has no idea who came to visit or what they encountered. Unless they proceed to another website and activate the Javascript again, it has no idea how long their interaction was on a specific page. There seem to be a lot of aspects that Analytics doesn’t monitor, and a lot of data in Google Analytics is erroneous. It doesn’t monitor anything apart from the stage of pages getting reloaded by default. Unless you utilize “event tracking,” any “non-page view interactions” are not logged.
In 5 easy steps, learn how to set up Google Analytics.
It’s not easy to set up Google Analytics. However, once you’ve got it set up, you’ll be able to swiftly have access to a wealth of useful information. If you put in a little effort today, you’ll get disproportionate benefits afterward.
To get started with Google Analytics, just follow these steps:
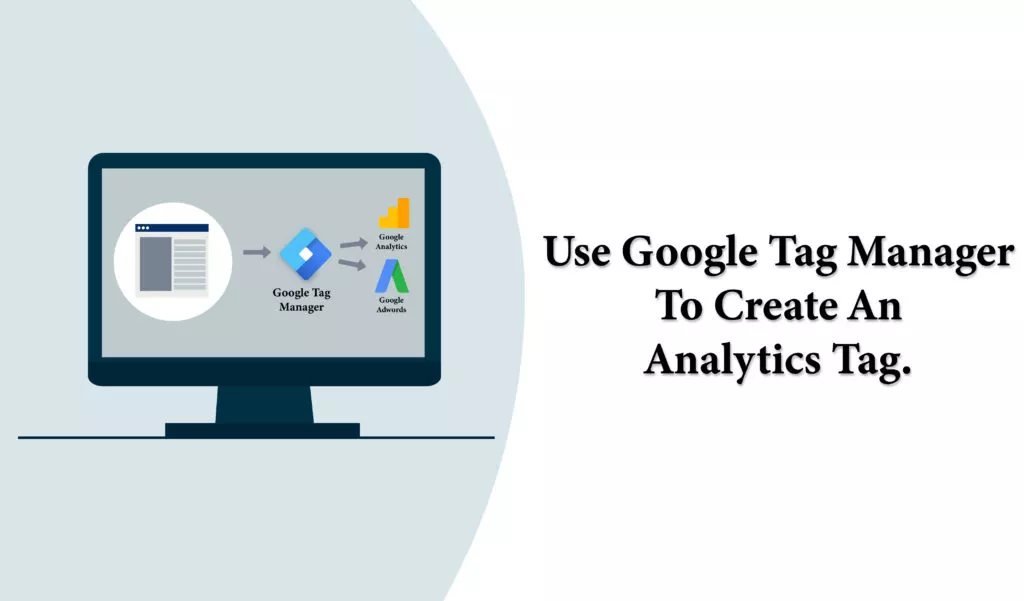
Step 3: Use Google Tag Manager to create an analytics tag.
Step 4: Make a list of objectives.
Step 5: Add a Google Search Console link to your website.
Step 1: Install Google Tag Manager
Google Tag Manager is a free tag management tool provided by Google. It collects all of your website’s information and transmits it to platforms like Facebook Analytics and Google Analytics. It also allows you to simply update and add tags to your Google Analytics code without having to write code manually on the back end, saving you time and hassles in the long run. For example, you want to know the number of people who clicked on your link. To accomplish this without Google Tag Manager, you’d have to manually alter all of the download URLs.
Step 2: Create a Google Analytics account.
Sign up for a Google Analytics account. Fill in all the details like your account name, website names, as well as the URL for the website. Make sure to choose the industry category for your website as well as the time zone for reporting. After you’ve completed those steps, accept the Terms and Conditions to receive your tracking ID. The tracking ID is a numerical sequence that instructs Google Analytics to deliver you analytics data. It’s something along the lines of UA-000000-1. The first set of numbers (000000) is your account number, while the second set (1) is the account’s property number.
Step 3: Use Google Tag Manager to create an analytics tag.
You’ll now learn how to add Google Analytics monitoring tags to your website. Click the Add a new tag button on your Google Tag Manager dashboard. You’ll be sent to a page where you can design your website tag. It will show you how to customize two aspects of your tag:
● Configuration. The location where the data collected by the tag will be stored.
● Triggering. What kind of information do you want to collect?
● Choose the sort of tag you wish to create by clicking the Tag Configuration button.
To create a Google Analytics tag, select “Universal Analytics” from the drop-down menu.
You’ll be able to select the sort of data you wish to track after clicking that. Then, under “Google Analytics Settings,” select “New Variable…” from the dropdown menu. After that, you’ll be directed to a new window where you can input your Google Analytics tracking ID. This will transmit data from your website directly to Google Analytics, where you may view it afterward.
Step 4: Create Google Analytics objectives.
You’ll need to notify Google how successful your website is.
To do so, you’ll need to use your Google Analytics dashboard to create objectives.
To begin, go to the bottom left corner and select the Admin icon.
This will open a new window where you’ll see the “Goals” button.
● You may then browse through several goal templates to determine whether one suits your intended aim. You’ll also have to decide on the sort of aim you wish to achieve. They are as follows:
● If your objective was for your visitor to arrive at a certain web page, this would be your destination.
● If your objective was for people to spend a certain period of time on your site, this would be the duration.
● Per session, there are a certain number of pages/screens. If you aimed to get people to visit a certain number of pages, for example.
● If you wanted people to watch a movie or click on a link, you’d use an event.
Step 5: Add a Google Search Console link to your website.
Google Search Console is a useful tool for webmasters and marketers that want to learn more about search metrics and statistics. You may use it to perform things like: Examine the rate at which your site is crawled by search engines. When Google evaluates your website, you’ll be able to see it. Find out which of your website’s internal and external pages link to it. Examine the search engine results for the keyword searches for which you rank. To get started, go to the main dashboard and click the gear icon in the lower-left corner.
Give your team access.
If you’re working with a group, ensure everyone on the team has access to the Google Analytics data.
To add users, simply follow these six Google instructions:
● To access the Admin dashboard, click the gear icon in the lower left-hand corner. ● Click the User Management button in the first column.
● Add new users by clicking the button.
● Enter the user’s Google account email address.
● Choose whatever permissions you wish to give them.
● Activate the Add button.
How can you filter out your traffic?
When someone comes to your website, it is recorded. You’ve arrived at your data. However, by providing Analytics your office’s IP address, you can filter yourself out. This is particularly crucial for low-traffic websites where the website owner’s traffic might be considerable.
In only a few clicks, you can build a filter in Google Analytics:
1. To access the “Admin” area, click the gear icon in the bottom left corner.
2. Click “Filters” in the right-hand column under “View.”
3. At the top, click the big red “Add Filter” button > “Create new Filter.”Give your filter a name (for example, “Chicago Office”).
4. Set up the three dropdown menus now.”Select Filter Type” should be changed to “Exclude.” “Select source or destination” should be changed to “traffic from IP addresses.”
5. Replace the “Select phrase” with “that is equivalent to.”
6. Put your IP address in the field now. If you don’t know this (and who doesn’t?) You may find it by searching for “What is my IP” on Google and copy and paste it into the appropriate field. 7. You’re done when you click “Save.”
Go to a deep, seldom frequented page and check at the Real-Time report to see if the filter is working. Have you noticed a visit to that page? If the answer is no, the filter is operational. Google Analytics will always be more accurate once it is installed. You may test your contact forms without having an impact on your conversion rate. Note that an IP address filter only works if your network’s IP address does not change. If your workplace or home network doesn’t have a “static” IP address, the filter won’t operate since your network will get a new IP address every time you connect to the internet. You’ll also need to update your IP address if you move workplaces, change internet providers, or reset your router.
How to use Google Analytics to set out goals
When a visitor completes an activity, they become a lead, subscriber, registrant, job candidate, donor, and so on. For the domain and the website, each conversion is a win. Google Analytics, on the other hand, has no idea what high reach looks like because websites are created in a variety of ways. As a result, we must tell it.
In only a few clicks, you can set up each form of conversion as a goal:
1. To access the “Admin” area, click the gear icon in the bottom left corner.
2. Click “Goals” in the right-hand column under “View.”
3. At the top, click the huge red “New Goal” button.
4. Put the name of your aim here. Consider the terms “contact lead” and “newsletter subscriber.”
5. Select “Destination” from the “Type” drop-down menu, then click “Continue.”
6. Enter the web address of your thank-you website in the Goal Details area. Take note of the suggestion beneath the field. Do not include the domain name in the URL. Simply type the page’s address, such as “/thank-you.”
7. Switch the toggle to On under “Worth” and give your objective a monetary value, even if it’s arbitrary. It’s completely OK to assign a $1 value to each objective.
8. Toggle the “Funnel” toggle to “On.”
9. Under “Required?” enter the page name and URL of the contact form (for example, “Contact Page” and “/contact”). the toggle switch should be set to “Yes” 10. After that, simply click “Save” and you’re done!
Any digital marketer must have Google Analytics installed insists the Web Design Jacksonville experts. It will guide and monitor you regarding the growth of your digital marketing platform and the elevation of your website categories. What you work over now will decide where you are in a year. The authenticity of your data and insights will be determined by your Analytics setup today and for the rest of your life.
Analytics is a decision-making tool, not just a scoreboard. If you do it correctly, your data will introduce you to functional tales over time. The results of your activities will be plain to see. That was successful! You will be graphed with the proper ROI and able to detect the actual target audience.
You will know everything that will help your help you enhance your website’s performance and improve its engagement rate.